Meal Prep Containers for Portion Control: The Complete Guide to Right-Sized Eating
Introduction
Once you have quality meal prep containers, the real magic begins. Your containers become more than just storage—they transform into powerful tools for portion control, meal planning, and building sustainable, clean eating habits.
Let me show you how to use your containers strategically to control portions naturally, plan your week effortlessly, and maintain your healthy lifestyle long-term.
Portion Control: How Containers Help You Eat Right
This is where meal prep containers become more than just storage. They’re actually portion control tools that make clean eating almost effortless.
Choosing the Right Container Sizes
I learned that container size directly influences how much I eat. When I use a huge container, I fill it up even if I don’t need that much food. When I use appropriately sized containers, my portions are naturally controlled.
Here’s my size guide based on meal types:
For main meals like lunch or dinner, I use twenty-four to thirty ounce containers. This gives me enough space for a palm-sized portion of protein, a generous serving of vegetables, and a fist-sized portion of healthy carbs. It’s the perfect amount to feel satisfied without overeating.
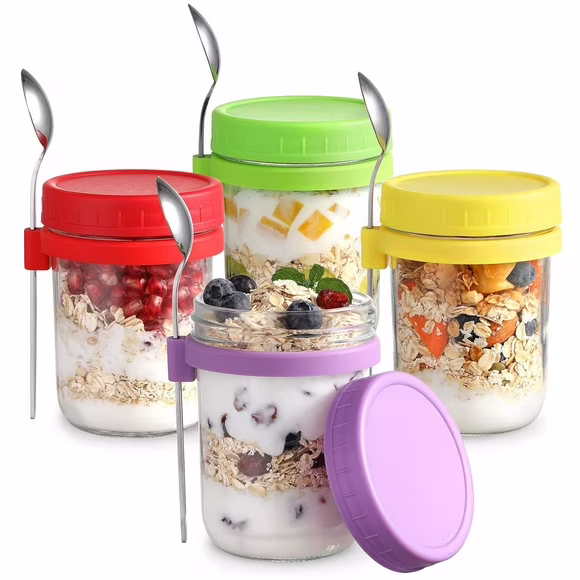
For breakfast, smaller containers in the twelve to sixteen ounce range work well. I’ll pack overnight oats, egg muffins, or a smoothie bowl with toppings. These sizes prevent me from making breakfast too large, which used to leave me sluggish. /https://www.walmart.com/ip/FOUKUS-Overnight-Oats-Containers-with-Lids
For snacks, I use eight to twelve ounce containers. This keeps my snack portions reasonable. A handful of nuts with some berries, hummus with vegetables, or a small protein portion with fruit all fit perfectly in these sizes.
For salads, I prefer larger forty to fifty ounce containers because salads compress. I need the extra space to pack in lots of greens and vegetables without crushing them.
Using Compartments for Balanced Meals
Compartmented containers have changed how I think about meal balance. Instead of eyeballing portions, the compartments guide me.
My favorite compartment setup is:
One large section taking up about half the container for vegetables. This reminds me to make plants the star of my meal, just like Dr. Mark Hyman’s food pyramid teaches. I pack this section with roasted vegetables, salad, or stir-fried greens.
One medium section for protein, about a quarter of the container. This is perfect for a palm-sized portion of chicken, fish, tofu, or beans. The size prevents me from overeating protein, which I used to do before I had visual portion guides.
One smaller section for healthy carbs, also about a quarter of the container. This is ideal for a fist-sized portion of quinoa, sweet potato, or brown rice. Having this separate compartment helps me enjoy carbs without overdoing them.
Some of my containers have tiny additional sections for nuts, dressings, or sauces. This keeps wet ingredients separate until I’m ready to eat, and it naturally limits how much dressing I use.
The Psychology of Pre-Portioned Meals
There’s something powerful about having your meals already portioned. When I’m hungry, I’m more likely to overeat if I’m scooping food from large containers in my fridge. But when my meal is already in its container, I eat what’s there and feel satisfied.
Pre-portioning also eliminates decision fatigue. I don’t have to think about how much to eat. I just grab a container and know it’s the right amount.
This has been especially helpful for managing my relationship with healthy foods that are easy to overeat. Nuts, avocado, hummus—I used to eat way too much of these healthy fats. Now I pre-portion them into small containers, and I enjoy them without overdoing it.
Meal Prep Capacity Considerations for Different Meals
Understanding capacity has helped me buy the right containers for different purposes. Here’s what I’ve learned about matching container size to meal type.
Breakfast Containers
Most breakfast meals need twelve to twenty ounces of capacity. I use these for overnight oats with toppings, breakfast grain bowls, egg scrambles with vegetables, or yogurt parfaits.
The smaller size keeps breakfast in check. I used to make huge breakfast portions that left me too full, and then I’d skip my mid-morning snack and be starving by lunch. Right-sized breakfast containers solved this problem.
Lunch and Dinner Containers
Twenty-four to thirty ounces is my sweet spot for main meals. This accommodates a balanced plate with protein, lots of vegetables, and a reasonable portion of healthy carbs.
If you eat larger portions, you might prefer thirty-two to forty ounce containers. I know people who are very active or have higher calorie needs who need the larger size. That’s totally fine. The goal is finding the size that matches your individual needs.
Snack and Side Containers
Eight to twelve ounce containers are perfect for snacks and side dishes. I pack things like cut vegetables with hummus, fruit with nut butter, or a small portion of trail mix.
These containers keep snacks from turning into mini-meals. When I used to pack snacks in large containers, I’d unconsciously fill the space and end up with a snack that had as many calories as a meal.
Soup and Liquid Containers
For soups, stews, and liquid-heavy meals, I prefer containers with at least sixteen to twenty-four ounces of capacity. You need extra room because liquids take up more space than solid foods.
Make sure any container you use for liquids has an excellent seal. I learned this lesson when soup leaked in my bag. Now I only trust containers with silicone gaskets or four-point locking mechanisms for anything liquid.

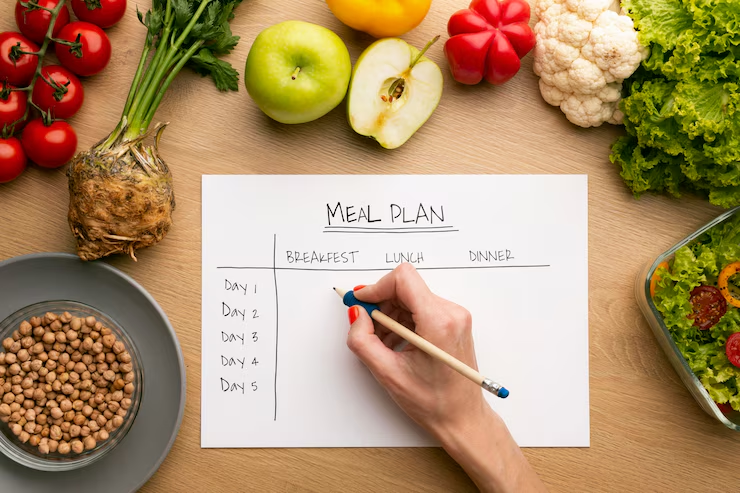
Meal Planning Made Easy with the Right Containers
Having a good system of containers has simplified my meal planning more than any app or planner ever did. Here’s how I use containers to streamline the whole process.
Planning by Container Count
I plan my week based on how many containers I have. If I have ten main meal containers, I know I can prep five days of lunches and dinners. This prevents me from overbuying groceries or making more food than I can store.
On Sunday, I lay out all my containers before I start cooking. Seeing the physical containers helps me visualize the week. I might set aside seven main containers for lunches, five for dinners, and a handful of small containers for snacks.
Batch Cooking and Storage Strategy
I cook large batches of three or four different components, then mix and match them in different containers. For example, I’ll roast a big tray of vegetables, grill several chicken breasts, and cook a pot of quinoa.
Then I assemble different combinations in my containers. Some get chicken with roasted vegetables and quinoa. Others get the same vegetables but with different proteins or grains. This variety prevents boredom while keeping prep time short.
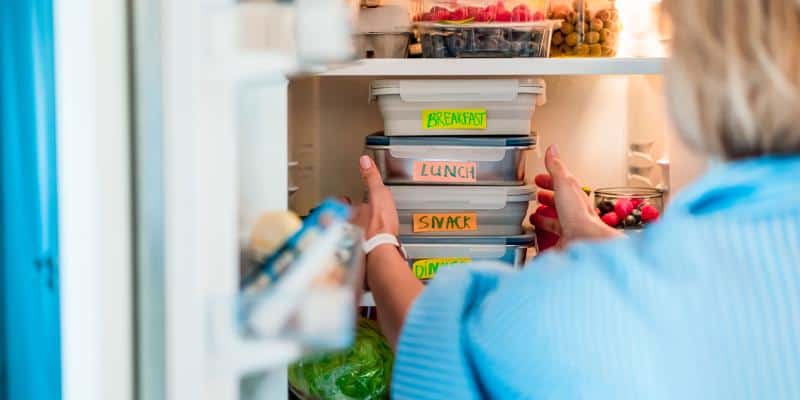
Having stackable containers means I can fit everything in my fridge. I stack containers by day, so I can easily grab Monday’s meals, then Tuesday’s meals, and so on. This organization has eliminated so much morning stress.
Color Coding and Labeling
I use different colored lids for different meal types. Blue lids are breakfast, green lids are lunch, and red lids are dinner. This simple system helps me grab the right meal quickly.
I stack containers from front to back. I have friends that use a dry erase marker and write the date on the container. Both methods work, and helps to track which meals to eat first and how long things have been in the fridge. Most meal prep stays good for four to five days, and the labels help me stay safe.
Caring for Your Containers
Good care extends the life of your containers and keeps them looking and performing like new. Here’s my maintenance routine.
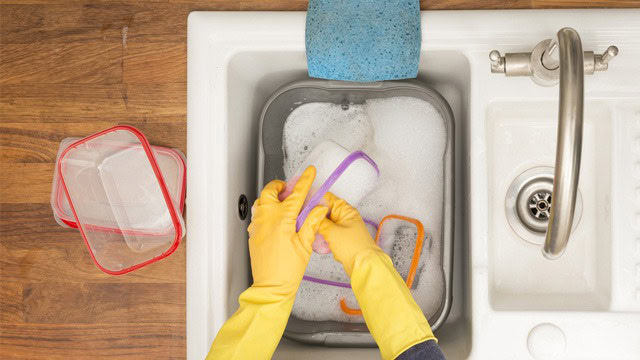
Washing Best Practices
Even though most meal prep containers are dishwasher-safe, I hand wash the lids. Dishwashers can be rough on seals and gaskets over time. I run the bases through the dishwasher but quickly hand wash the lids with hot soapy water.
For stains, I soak containers in hot water with baking soda before washing. This works better than any harsh cleaner and doesn’t damage the containers.
Removing Odors
Sometimes containers pick up strong smells from foods like garlic or curry. I fill them with warm water and add a tablespoon of white vinegar, then let them sit overnight. In the morning, I wash them normally, and the smell is gone.
Leaving containers open to air out after washing also helps prevent odors from developing.
Storage Between Uses
I store my containers with the lids slightly ajar, not snapped shut. This allows air circulation and prevents that musty smell that can develop in sealed containers.
I keep all my containers in one designated cabinet so I know exactly where everything is. Having a system makes meal prep less stressful because I’m not hunting for lids.
When to Replace Containers
Even good containers don’t last forever. I replace containers when the seals start failing, when they develop cracks or chips, or when plastic containers become cloudy or discolored.
Glass containers last much longer than plastic, which is another reason I prefer them for my most-used containers. My glass containers are still going strong after years, while plastic ones usually need replacing after a year or two of heavy use.

Building Your Container Collection Over Time
You don’t need to buy everything at once. I built my collection gradually, and this actually worked better because I learned what I needed as I went.
Essential Starter Set
If you’re new to meal prep, start with five main meal containers in the twenty-four to thirty ounce range. Add three to four smaller containers for snacks or sides. This basic set will handle most of your weekly meal prep needs.
Choose one material to start with—probably glass if you reheat food or good quality BPA-free plastic if you need lightweight options. Having containers that stack together makes storage much easier.
Adding Specialized Containers
As you develop your meal prep routine, you’ll discover specific needs. I added soup containers after I started making weekly batches of stew. I bought salad containers with separate dressing compartments when I got tired of soggy greens.
Let your actual meal prep experiences guide your purchases. This prevents you from buying containers you’ll never use.
The Ideal Collection for Regular Meal Preppers
After years of meal prepping, here’s what I consider the ideal collection:
- Ten to twelve main meal containers for lunches and dinners
- Four to six breakfast containers
- Six to eight snack containers
- Two to three large containers for batch cooking and storage
- Three to four soup or liquid-specific containers
This might seem like a lot, but it allows me to prep a full week of meals plus snacks without running out of containers mid-week.
Growing Your Collection Strategically
Don’t feel pressured to buy everything at once. I recommend this approach:
Month 1: Buy your essential starter set and use it consistently. Learn which sizes you use most and what features matter to you.
Month 2-3: Add specialized containers based on what you’re actually cooking. If you’re making a lot of soups, invest in quality liquid containers. If you’re packing salads daily, get proper salad containers.
Month 4-6: Round out your collection with backup containers in your most-used sizes. Having extras means you can prep more meals at once or have clean containers ready when others are in the dishwasher.
Ongoing: Replace worn containers as needed and add new specialty containers when you expand your meal prep repertoire.
Storage Solutions for Your Container Collection
As your collection grows, organization becomes important. Here’s how I keep everything manageable:
Designate one cabinet or drawer for all meal prep containers. Having everything in one spot makes packing meals so much faster. Drawers are my favorite place to store: the top drawer for small items, middle drawer for medium size containers and bottom drawer for larger storage.
Keep the lids on the containers I group containers by size, which makes finding the container much easier than digging through a pile.
Keep frequently used containers at eye level or in the most accessible spot. My everyday main meal containers are front and center, while specialty containers I use less often are on higher or lower shelves.
Signs You Need More Containers
You’ll know it’s time to expand your collection when:
You want to try new types of meal prep (like freezer meals or soups) but don’t have appropriate containers
You’re running out of clean containers mid-week
You’re limiting your meal prep because you don’t have enough containers
You’re using containers that aren’t quite the right size just because you don’t have enough of the correct size
You’re constantly washing containers between uses instead of having enough to last the week
My Final Thoughts on using Containers Strategically
The container method has truly transformed my clean eating journey. By choosing the right sizes, using compartments strategically, and building a collection that matches my actual needs, I’ve made portion control automatic and meal planning effortless.
The beauty of this system is that it works without requiring willpower or constant decision-making. The containers do the work for me. I fill them with healthy food, store them properly, and grab them when I need them. It’s simple, sustainable, and incredibly effective.
When your food comes in the right portions and you have a meal planning system that fits your lifestyle, clean eating becomes your natural routine rather than a constant struggle. Your containers are the foundation that supports all your healthy eating habits, and when you use them strategically, success follows naturally.
/linhttps://kelliannscheibe.com/container-method-best-meal-prep-clean-eating